
Want to try your hand at sketching portraits? A lot of people, especially artists who are new at it, get intimidated by the idea of doing portraits. It’s not as hard as it seems and the only way to get it right, like any form of art, is through practice.
Here are a few steps on how you can begin and get better at drawing realistic eyes.
Step 1
An artist, especially one who wants to learn to draw facial features realistically, needs to observe them first. If you have already done so, you might have noticed that the eyes are not perfectly symmetrical and neither are the eyebrows.
So, keeping this knowledge in mind, you can go against your ingrained thinking of needing to draw them both exactly the same and instead, observe/imagine your subject in detail to figure out the differences between both the eyebrows and the eyes.
Ask yourself questions like ‘is the top of the eyelid fold a little straighter?’ ‘Does the tear duct point slightly downward or upward?’ In this way, your observational skills will get better with time.
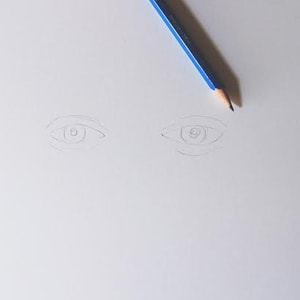
Using a 2B pencil, draw a basic outline of each eye, the pupil and iris along with the light reflection over it. Also, add the outline of the eyelids. Begin practising this first, keeping it as simple and basic as possible. Try and capture the most accurate shapes possible before moving to the next step.
Step 2
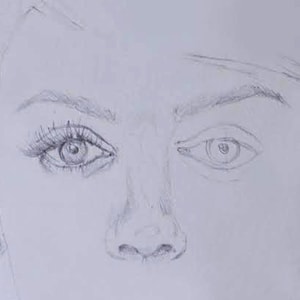
Once you are getting the basic shapes right, you can slowly start adding more and more details to your sketches. Now you can position the eyebrows on the face and also add details like the top and the bottom eyelashes. Keep correcting any shapes you’ve gotten wrong and keep adding details.
Step 3
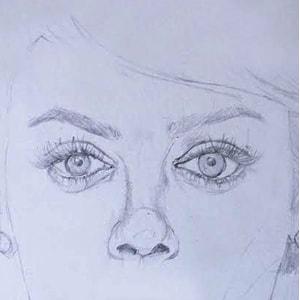
Draw very light guidelines to help you place everything on the page correctly. You can erase them later. Give the nose a bit more curve by drawing a circle on it as shown in the picture. Once you are happy with the placement of the features and the shapes, you can begin shading with a 4B pencil as the next step.
Step 4
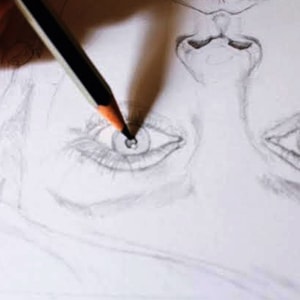
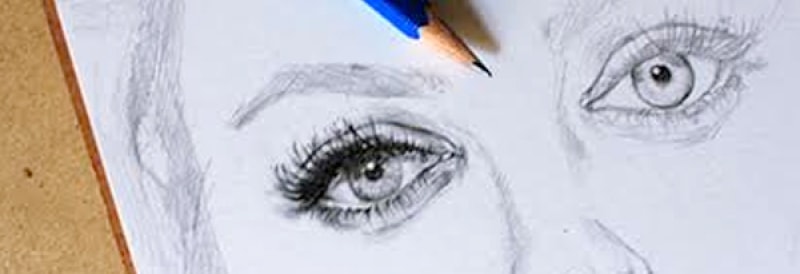
Pick up that 4B pencil and start adding a tinge darker to the eyes by shading the pupils. Make sure that you leave an overlapping circle of white, which is how you can show the reflection of the light source appearing in the eyes.
Next, using a 2B pencil, draw the shadows of the eyelids and eyelashes around the iris. Add in details to the iris and make sure that you add a lighter shade at the bottom where the light hits it. From this point onwards, you will need to keep going back and forth between your 2B and 4B pencils to create shadows in the eyes.
Step 5
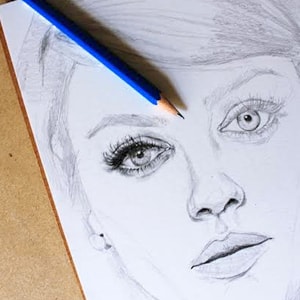
Use your 4B pencil to draw the details of the eyelashes and also to shade the top portion of the eyelid and the fold. If your subject is wearing makeup, like mascara, press the pencil harder to get the desired effect.
Step 6
The white portion of the eye is called the ‘sclera’. It may be white in theory, but the eyelashes often throw shadows in it so you will need to add in some lighter shading with a 2B pencil, depending on the source of light.
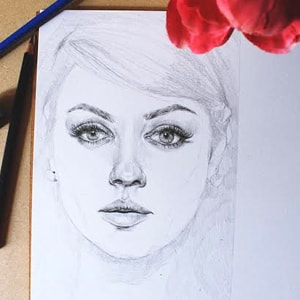
The eyes, just like the face itself, can be quite a challenge to draw. Even artists with many years of practice face difficulties in getting them right and find themselves unsatisfied with their portraits, from time to time.
The thought that you can’t get it right could get you feeling low but don’t let it stop you from trying to get it right the next time. Don’t be discouraged.
Keep practising; one day you will be happily surprised by the result!

Did you find this article useful in learning to draw realistic eyes?
Share your thoughts with us in the comments below.
Leave a comment
Comment added
Comment updated
Comment deleted
More inspiration
“
“Art is not what you see but what you make others see.”